For many PC users, the world of audio can be a confusing one. You might have a fancy headset or a high-quality speaker system, but if your computer’s audio settings aren’t dialed in, you won’t be getting the most out of them. This is where Realtek Audio Console comes in.
Table of Contents
This built-in software, often found on Windows machines with Realtek audio codecs, empowers you to take control of your sound experience. Whether you’re a casual listener, a gamer seeking immersive audio, or a content creator needing crystal-clear recording, Realtek Audio Console offers a range of features to personalize your audio.
This comprehensive guide dives deep into the world of Realtek Audio Console, equipping you with the knowledge to unlock its full potential. We’ll explore its functionalities, delve into its settings, and provide valuable tips for optimizing your audio experience.
Realtek Audio Console: An Overview
Realtek Audio Console, also known as Realtek HD Audio Manager in older versions, is a software application pre-installed on many Windows PCs. Developed by Realtek Semiconductor Corporation, a leading provider of audio solutions for computers and mobile devices, the console acts as a control panel for your sound settings. Through this interface, you can manage various audio aspects, including:
- Playback: Configure your speakers, headphones, or other audio output devices.
- Recording: Adjust microphone settings and manage recording quality.
- Sound Effects: Apply enhancements like equalizer presets, surround sound simulation, and noise reduction.
- Digital Output: Set up digital audio connections like S/PDIF for high-fidelity sound.
- Volume Control: Adjust individual volume levels for different applications and channels.
Is Realtek Audio Console Right for Me?
If your Windows PC uses a Realtek audio codec, then Realtek Audio Console is the native software for managing your sound settings. You can usually verify this by checking your device manager or by searching for “Realtek Audio Console” in your Start Menu.
How do I install the Realtek Audio Console?
If Realtek Audio Console is not pre-installed on your device then you can follow this guide on how to install Realtek Audio Console on Windows. A step-by-step video tutorial is also available on YouTube on the same and you can watch it here.
However, if you’re using a high-end sound card or a dedicated external audio interface, you might have a manufacturer-specific software suite that offers more advanced features. In such cases, the dedicated software might take precedence over Realtek Audio Console.
Unveiling the Interface: A Guided Tour
Upon launching Realtek Audio Console, you’ll be greeted by a user-friendly interface with several distinct sections:
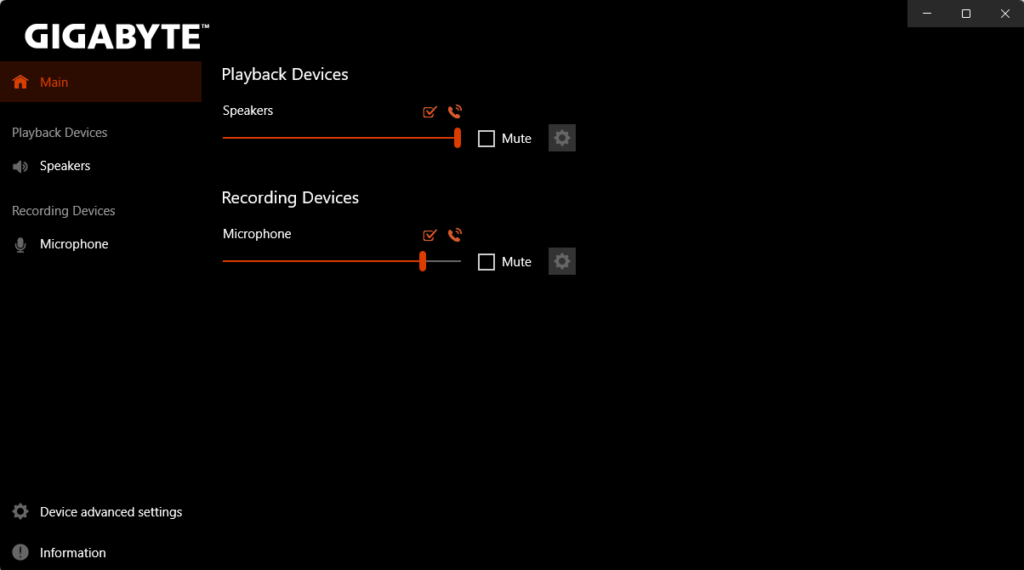
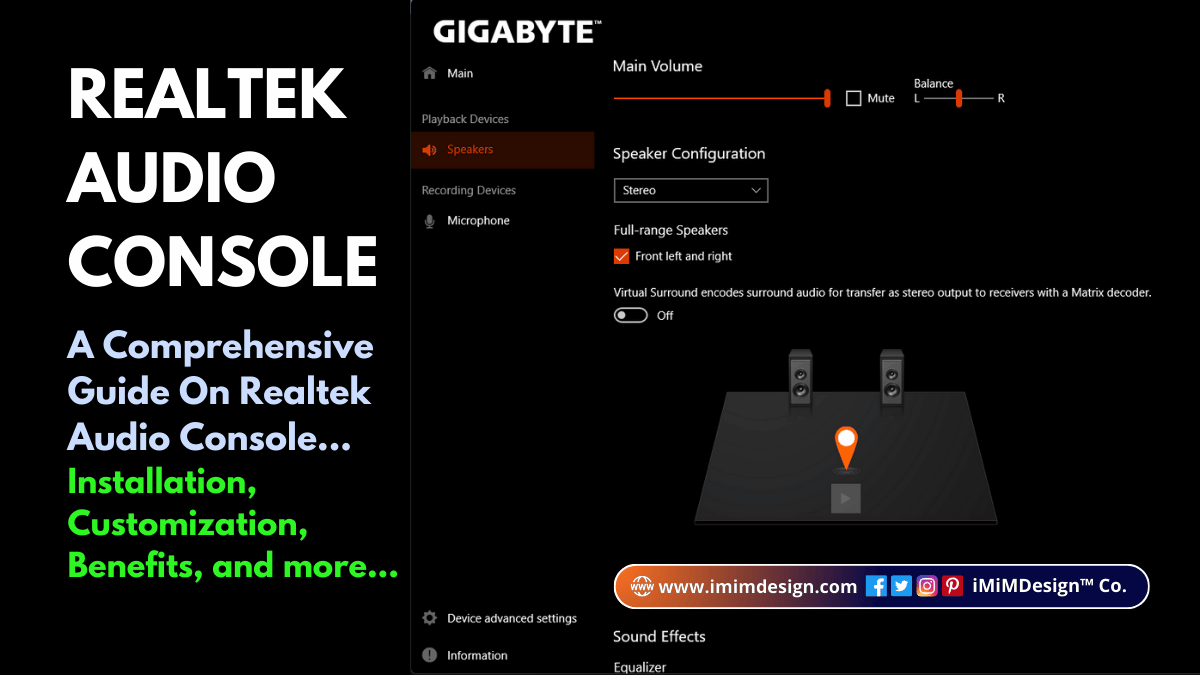
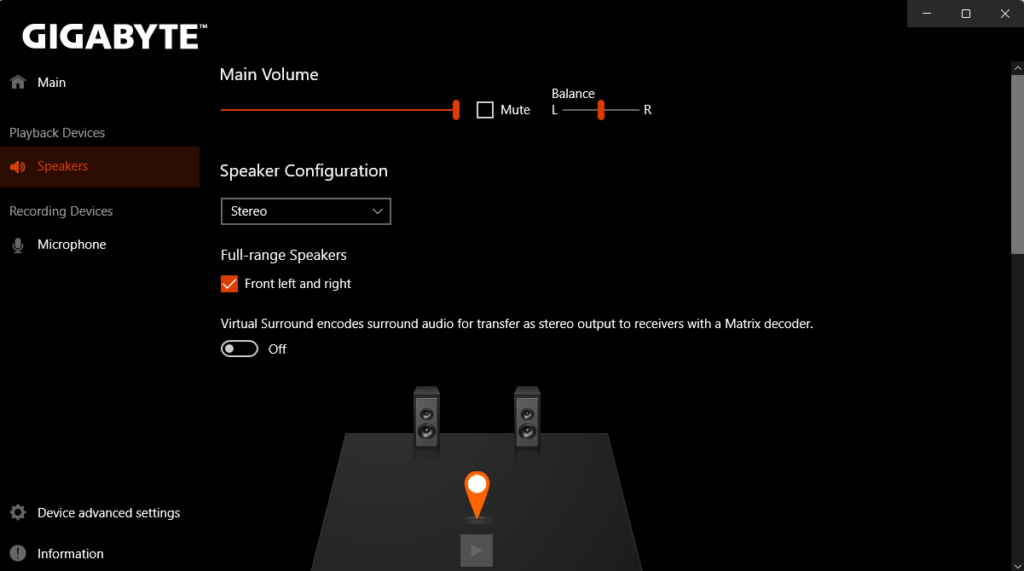
Speaker/Headphone Selection: The upper left corner typically displays the currently selected audio output device, allowing you to easily switch between speakers, headphones, or other outputs.
Volume Control: A prominent volume slider controls the overall system volume. Individual volume adjustments for specific applications and channels might be found in separate sections.
Sound Effects Tab: This tab offers a range of sound enhancements (scroll down to see), including:
- Equalizer: Modify the frequency balance of the sound for a more personalized listening experience. Presets like “Rock” or “Bass Boost” are often available, or you can create your own custom settings.
- Environmental Effects: Simulate different listening environments like a concert hall or a stadium.
- Noise Reduction: Minimize background noise for clearer audio during calls or recordings.
- Room Correction: Optimize the sound based on your room acoustics (advanced feature).
Microphone Tab: This tab allows you to configure your microphone settings (scroll down to see), including:
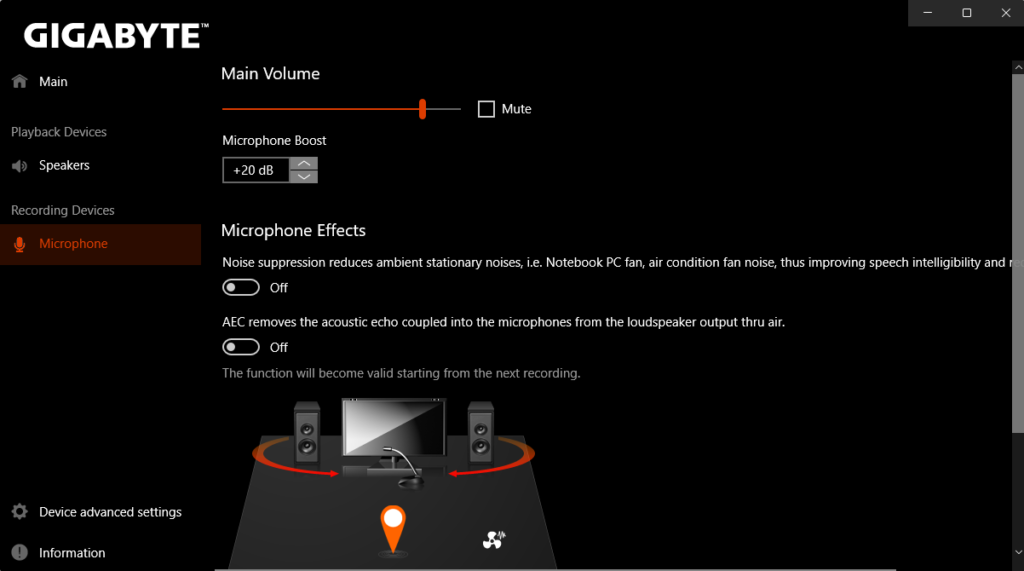
- Microphone Selection: Choose the active microphone.
- Volume Boost: Increase microphone input gain.
- Noise Suppression: Reduce background noise during recordings.
- Echo Cancellation: Eliminate audio feedback during calls.
Digital Output Tab: If your PC supports digital audio output via S/PDIF or optical connections, this tab enables configuration for high-fidelity sound.
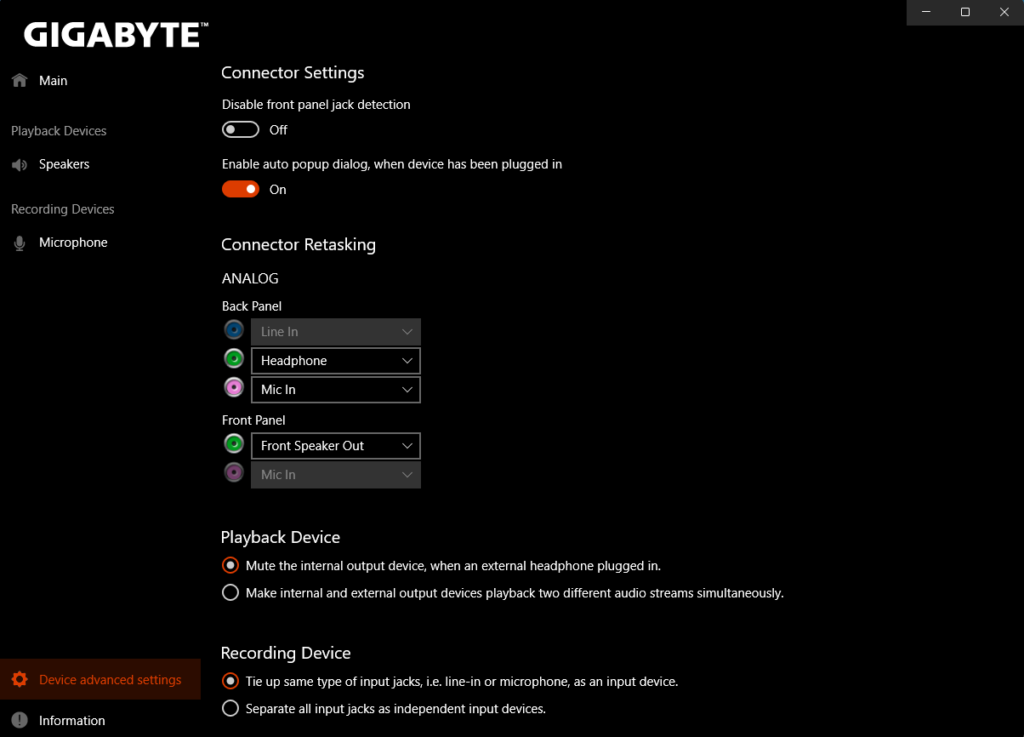
Device Advanced Settings (Optional): Some versions of Realtek Audio Console offer advanced settings for experienced users. These might include options for multi-channel speaker setups, sample rate adjustments, and system sound customization.
Understanding the Icons: Familiarize yourself with the icons throughout the interface. Some commonly found icons signify:
- Mute: Silences the selected audio device.
- Microphone Boost: Increases microphone input gain.
- Stereo/Surround Sound: Toggles between stereo and surround sound modes (availability depends on your hardware).
Optimizing Your Audio Experience with Realtek Audio Console
Now that you’re familiar with the interface, let’s delve into some practical tips on optimizing your audio experience:
Tailor the Sound to Your Preference:
- Experiment with the equalizer presets and create custom profiles for different genres of music, movies, or games. Focus on boosting frequencies that enhance the specific content you’re enjoying.
- Remember, a balanced sound signature is often preferable for clear and natural audio reproduction. Avoid over-emphasizing bass or treble, as this can lead to a distorted or fatiguing listening experience.
Enhance Your Gameplay with Immersive Audio:
- Many gamers prioritize precise positional audio cues to gain a competitive edge. In Realtek Audio Console, explore options like “Scout Mode” or similar features that emphasize sounds like footsteps or gunfire. These can help you pinpoint enemy locations and react faster.
- Surround sound virtualization can also enhance immersion. While it won’t replicate a true surround sound setup, it can create a more expansive and enveloping soundscape for your games.
Sharpen Your Communication with Crystal-Clear Recordings:
- For clear voice chat, ensure your microphone volume is set appropriately. A slight boost might be necessary to ensure your voice is audible to others.
- Utilize noise suppression features to minimize background noise like keyboard clicks or fan whirring. This ensures your voice stands out clearly during calls or recordings.
- Experiment with echo cancellation settings to eliminate audio feedback during online calls.
Finding the Right Balance:
- While sound enhancements can be tempting, it’s crucial to maintain a balance. Excessive use of features like bass boost or surround sound virtualization can introduce distortion and degrade the original audio quality.
- Start with subtle adjustments and listen carefully to the results. A little goes a long way in achieving a rich and enjoyable listening experience.
Advanced Tips for Power Users:
- Sample Rate and Bit Depth: For audiophiles, Realtek Audio Console might offer options for adjusting the sample rate and bit depth of playback. These settings impact audio quality, but the benefits are often subtle for most users.
- Standard CD-quality audio uses a 44.1 kHz sample rate and 16-bit depth. Higher settings can offer improved fidelity but might require more powerful hardware for smooth playback.
- It’s generally recommended to leave these settings at their default values unless you have specific requirements or experience compatibility issues with certain audio formats.
Room Correction (if available):
- Some advanced versions of Realtek Audio Console offer room correction tools. These use microphone measurements to analyze your room acoustics and adjust the sound output accordingly. This can be particularly beneficial for optimizing audio for movie watching or critical listening.
- However, room correction tools can be complex to use effectively. Consult online resources or consult a professional audio technician for guidance if you’re unsure about these features.
External Resources and Support:
- If you encounter difficulties with Realtek Audio Console, consult the official Realtek website for support documentation, troubleshooting guides, and driver updates. Although it’s difficult to troubleshoot such issues as each device and supported drivers are different. So, its better to reach out to the official website of the system motherboard’s official website to download the official driver. Remember, without the officially supported driver, you won’t be able to utilize the benefits of Realtek Audio Console.
- Online forums and communities dedicated to PC audio can also be valuable resources for finding solutions and discussing best practices.
Conclusion: Mastering Your Audio with Realtek Audio Console
Realtek Audio Console empowers you to personalize your audio experience on your PC. By understanding its functionalities, exploring its settings, and implementing these optimization tips, you can unlock its full potential. Whether you’re a casual listener, a competitive gamer, or a content creator, Realtek Audio Console equips you with the tools to tailor your sound to your specific needs and preferences. With a little experimentation and exploration, you can transform your PC into an immersive and enjoyable audio hub.
Additional Considerations:
- Briefly discuss the limitations of Realtek Audio Console. While it offers a range of features, it might not cater to the needs of professional audio producers or audiophiles seeking the most advanced functionalities. For such users, dedicated external sound cards or Digital Audio Converters (DACs) might be necessary.
- Conclude by emphasizing the importance of high-quality audio hardware. While Realtek Audio Console can enhance your sound experience, the quality of your speakers, headphones, or microphone ultimately plays a significant role in the final audio output. Consider investing in decent audio equipment to maximize the benefits offered by Realtek Audio Console.
By following this comprehensive guide, you’ll be well on your way to mastering your audio experience with Realtek Audio Console. Let me repeat if you don’t have Realtek Audio Console installed on your system, then follow this guide to learn how to install Realtek Audio Console driver and application on your system.
Remember, the journey of sound exploration is an ongoing process. Experiment, listen carefully, and personalize your settings to create an audio experience that truly resonates with you. Don’t forget to share this article with your friends and colleagues. Remember, sharing is caring…